



Is this the right resource? Yes, if you satisfy the following points then this tutorial is for you.
- Know basic JavaScript programming
- Want to setup your first AngularJS project with best practices and guidelines.
- Don’t know AngularJS
- Have little experience working with GIT
What is AngularJS?
Not just JavaScript MVW framework but AngularJS lets you build and maintain dynamic web applications. Concepts like data binding and dependency injection make it a powerful framework, because it eliminates lots of code you would otherwise have to write. So this completely redefines how front end applications are built these days.
(Note - MVC is Model-View-Controller and when we have anything other than controller then it is referred as MVW - Model-View-Whatever)
What will you learn in this tutorial?
-
Standard Architecture Setup
This blog post is a complete step by step guide to set up AngularJS project. All you need to do is to follow these steps and you will have a standard architecture of AngularJS project. We will use standard solution called angular-seed for setting up the basic architecture.
-
Sample Application
This tutorial will not only help you to create basic architecture for AngularJS project, but also create one small application with most important and frequently required AngularJS components. Once the basic architecture is setup we will develop a small web application of “weather forecasting”. We will be using Yahoo weather API for this application.
Ready for the battle?
No not yet. Collect your weapons first.
All you need is GIT and your favorite text editor, that’s it!
Step 1 – Get the skeleton (Standard Architecture Setup)
Let’s start with setting up standard file structure for your application. I always like to start things with some boilerplate. Most recommended boilerplate project for AngularJS development is angular-seed. Angular-seed gives you a perfect skeleton to create empty AngularJS project. Other benefit with this type of project setup is, it comes with base for unit testing activity using Karma and Jasmine. Learn about Karma here.
Complete guide of how to get this skeleton from angular-seeds is documented here . Please go through the link for more details. In the section below, I am just trying to write important and customized steps of getting this skeleton.
1. Clone from angular-seed repository – Use following command in GIT BASH to clone the repository
git clone http://github.com/angular/angular-seed.git
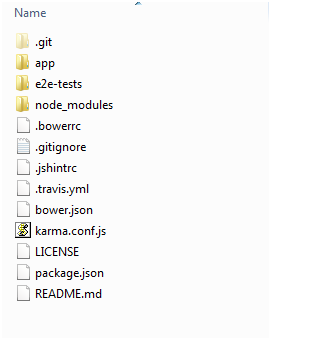
2. Install Dependencies - After cloning from repository you can see following 2 files in your local folder at root level.
-
- package.json - Contains the npm packages for the tools we need. Remove karma related entries if you don’t want unit testing modules.
- bower.json - contains AngularJS and its dependencies
Run following command to install above dependencies.
npm install
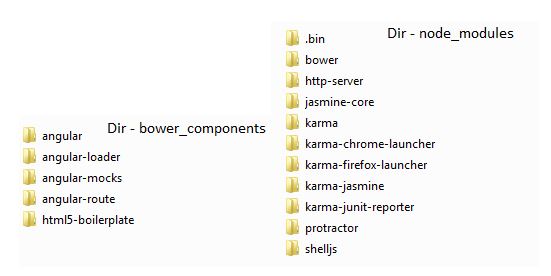
This command will first install the dependencies from package.json to “node_modules” folder and internally call bower install which will then install dependencies from bower.json to “bower_components” folder. If for some reason it’s not working then you can manually check bower_components folder under app folder and if it looks empty then manually run “bower install” command.
Don’t forget to check above mentioned folders to understand what you just did. They should look something like this screenshot.
3. Start the webserver - Above process configures a simple development web server. In order to start the real development we will need to start the server. This can be done with following command:
npm start
Hit this URL in browser - http://localhost:8000/app/index.html.
4. Done.
Conclusion
Here we complete the process of setting up a standard architecture of AngularJS project. If everything is working fine then you will see basic application running when you access the above URL.
Next part of tutorial will help you understand how to write your AngularJS application including details of multiple AngularJS basics. After completing next part of the tutorial you will be able to write any simple AngularJS application.


 View Previous Blog

